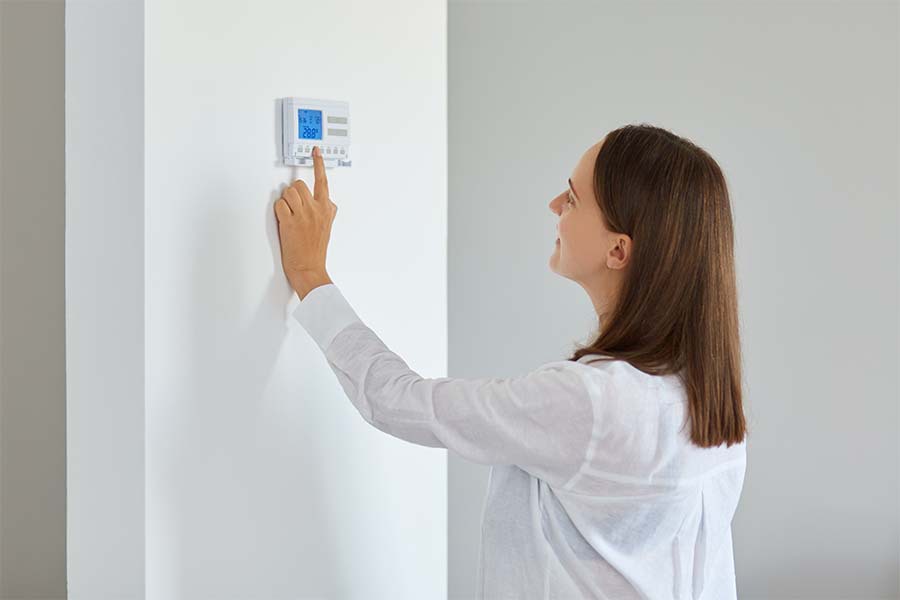
Installing a programmable thermostat may help you in substantial savings on heating costs since these devices can be configured to automatically regulate the temperature depending on the time of day and occupancy, so you aren’t paying to heat or cool the home when nobody is around.
Before beginning your thermostat installation, evaluate the existing thermostat and the wires that go from the furnace to the thermostat to see whether the present arrangement is adequate for a programmed thermostat or whether an extra wire is required.
Suppose the intention is to install a normal non-programmable thermostat. In that case, this examination can be used to become familiar with the thermostat’s connections and where it is required to link to the furnace.
Furthermore, inspect the hole behind the thermostat to verify that the replacement thermostat has an appropriate faceplate to fit the hole.
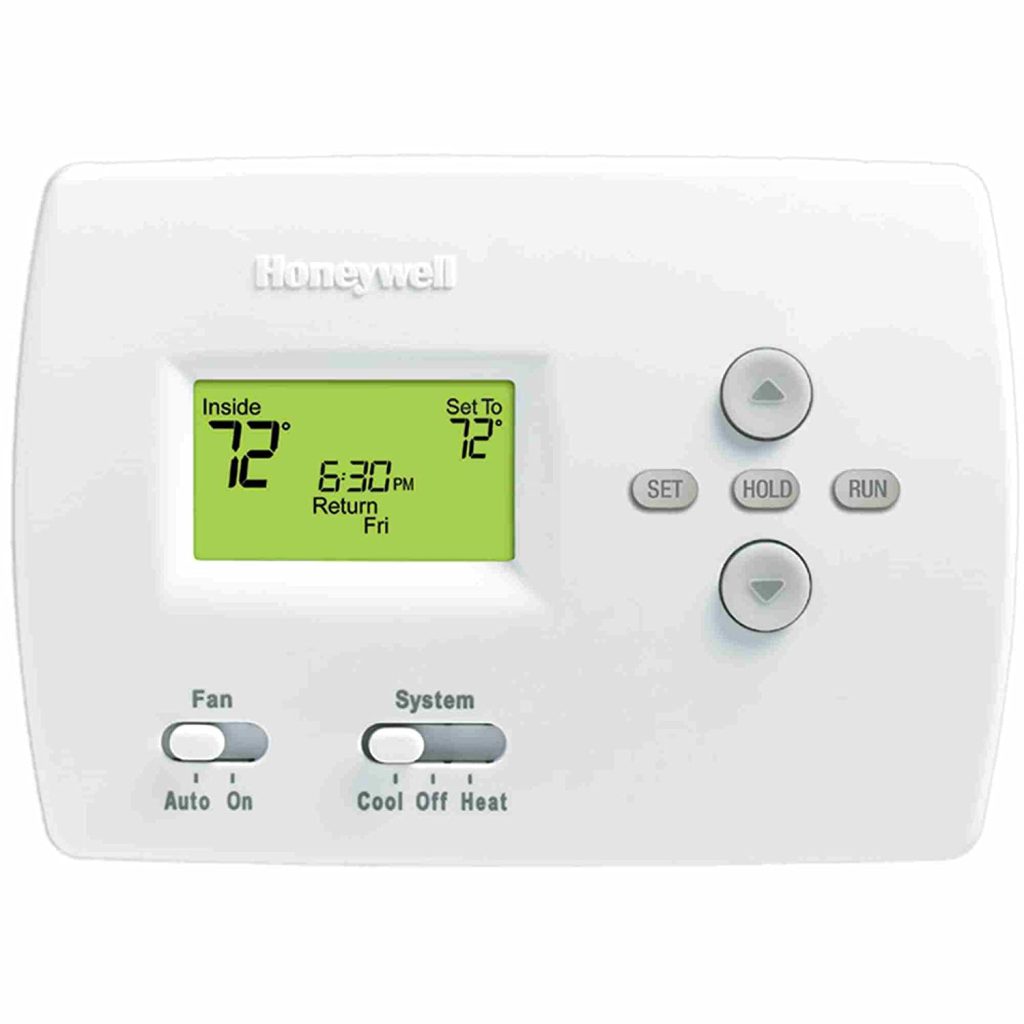
Installing in a Programmable Honeywell Thermostat
Installing a new thermostat is a simple task that requires minimal equipment.
These instructions are for a simple programmed thermostat that is appropriate for the following heating and cooling systems:
- A gas, oil, or electric furnace—the present thermostat has two or three wires attached.
- A central air conditioner—the present thermostat is wired with two or three wires attached.
- A hot water system with or without a pump—the present thermostat has two wires linked.
- A millivolt system—the current thermostat is wired with two wires.
- Central heating and air conditioning—the present thermostat is wired with four or five wires.
Please keep in mind that these instructions do not apply to a heat pump system, a multi-stage system, or electric baseboard heaters.
Dispose of the Previous Thermostat
Honeywell Thermostats usually come in two pieces: a cover that lifts or snaps off and a base that screws into the wall. It’s possible that some of them are divided into three sections. The purpose is to reveal the thermostat wires.
- Turn off the heat and air conditioning equipment at the circuit breaker box. Separate circuits will be used for the heater and air conditioner.
- Take the old thermostat’s cover off. Some covers may have a little tab to push in on the side or bottom to remove the cover, while others may simply peel off.
- Step 3 can be skipped if you can see the cables coming out of the wall.
- You probably have a three-part thermostat if you can’t spot wires coming out of a hole in the wall. Disconnect the second section of the thermostat, uncovering the thermostat wires, by unscrewing two or three mounting screws.
- If there isn’t a second portion, the designated screw terminals may be on the backside of the wall plate. To access the cables, you’ll need to take the wall plate off.
Wires Should Be Labeled
- The cables from the wall are connected to the thermostat’s indicated terminals.
- Small bits of tape should be labeled with the same letter, or a letter and numerical combo, as the thermostat terminals.
- Wrap the labels around the wires that correspond to them. It’s worth noting that the wire colors might not always match the terminal’s names.
Wall Plate should be removed.
- Remove the mounting screws from the wall plate to disconnect it from the wall once the wires are identified. Slide the wall plate away from the wall by a few centimeters.
- Disconnect the wires out from the wall plate by loosening the screws securing them to the terminals. Let the wires pass through the gap in the wall plate but retain a firm grip on them.
- Avoid sliding the wires back into the wall by wrapping them around a pencil.
Make sure the new thermostat is ready to use.
- On the new thermostat, remove the wall plate and cover.
- Cover the hole in the wall with the wall plate. Keep in mind the wall plate is level using a torpedo level.
- Make a mark on the wall where the fastening screw holes will go.
Connect the New Thermostat’s Wall Plate
- Screw anchors—small plastic pieces used to help keep screws in drywall—should be included with the new thermostat. The wall plate is held in place by the anchors and screws.
- Drill pilot holes in the wall where you marked them before. Not the lip, but the wall anchor body should be the size of the holes.
- Using a hammer, press down the wall anchors into the holes. The anchor’s lip should be level with the surface of the framework.
- Slide the wires through the plate’s hole while holding the wall plate in place.
- Mount the wall plate to the wall anchors by pressing it firmly against the wall and screwing it in place with the supplied screws.
Connect the wires together.
- The kind of thermostat will determine how the thermostat wires are connected to the new thermostat. Several thermostats feature screw terminals, whereas others have push-in connectors. Connecting the wires in both circumstances entails matching the designated wires to the appropriate terminal connections. If you have an R and an Rc wire, or your wire labels do not match the new terminals, see the extra wiring instructions.
- A clean, uniform 1/4 inch of exposed wire is required for the push-in connections. Cut and strip the wires with wire strippers as needed. Afterward, put the wire’s bare ends into the appropriate push-in connectors.
- Coil each wire clockwise around its corresponding terminal screw and clamp the screw down over the cable for screw terminals.
Complete your setup.
- As recommended, place the batteries. Then, as suggested by the manufacturer, attach the faceplate onto the wall plate and configure your new thermostat!
How To Install A Honeywell Wi-Fi Thermostat In Place
There are three main phases in the installation process:
- Taking out the old thermostat
- Getting the new gadget to work
- Putting the thermostat’s controls in place
Taking Out the Old Thermostat
Turn off the electricity to the HVAC system and the thermostat by turning off the associated breaker on your home’s circuit breaker panel before you begin dismantling your old thermostat.
You’re now ready to get started. The following are the next steps:
- Remove the front-facing panel of the thermostat off the mount carefully, being mindful not to damage the wiring connections.
- Examine the various colored wires attached to the terminals.
- Examine the thermostat’s wire labels.
You may use the labels on the thermostat to name each wire on the panel; this will make it easier to connect the wires to the replacement thermostat’s terminals afterward. You may also photograph the wire for future use.
Regardless of your approach, be sure you don’t cut the wires when applying the labels. Alternatively, carefully pull each wire out to make room for the label to wrap around it.
Look for and name the following items when you label the wires:
- A “C” cable powers the thermostat.
- The “R” and “RC” circuits are connected via a jumper wire.
- The remaining wires will allow you to connect the relevant wires to the appropriate terminals quickly.
After you’ve finished labeling, remove the terminals with a screwdriver so the wires are no longer attached. Then:
- Remove the old thermostat’s wall plate
- Gather the wires that have protruded from the opening in the wall.
- Twist them to keep them from slipping back into the wall, but be careful not to lose the labels in the process.
Getting the New Thermostat to Work
- Unpack the new thermostat and double-check that you have all of the parts listed in the handbook.
- Install the wiring in the opposite order.
- Remove the wall plate from the front of the new thermostat.
- Make sure the wall plate is level before attaching it to the wall. Use the screws to secure the wall plate.
- Start by looking at the plate and attaching the wires to the appropriate terminals. The screws to the terminals should then be tightened.
- If the wiring is not tight, gently push it towards the middle of the wall plate before covering it.
- Place the coin-like battery in the slot on the thermostat’s bottom right-hand corner.
- Cover the table with the cover.
- Reboot the thermostat and the HVAC unit.
- The digital display on the thermostat should now turn on, showing that the equipment is powered up.
Configuring the Thermostat’s Controls
Before you begin this stage, read through the owner’s manual to understand where and how to begin configuring the controls. The “system type” function is one of the first things you should configure. This must be completed prior to configuring the Wi-Fi connection. It will also assist in ensuring that the HVAC systems function correctly.
Here is how to configure the “system type” function:
- “System” should be pressed.
- Keep the center button on the bottom of the display pressed. Please keep in mind that all of the buttons at the middle bottom are purposefully left blank.
- Hold down the system button until the display changes.
- Then, using the “up” or “down” arrows, pick function 0170.
- Be advised that the default setting is for a single-stage furnace and air conditioning. However, if you have a different system type, such as a two-stage HVAC or a heat pump, scroll down through the arrows till you find your system type.
- The customer handbook will also detail the different types of systems and their accompanying codes.
- Once you’ve decided on your system model, click “done” on the lower side of the display.
- You may now configure the date and time and the Wi-Fi connection by following the user guide. You may now add any additional controls you like and begin using your new Honeywell Wi-Fi thermostat!
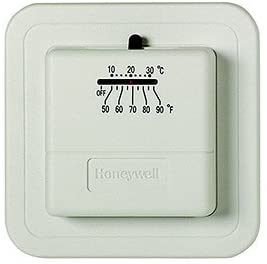
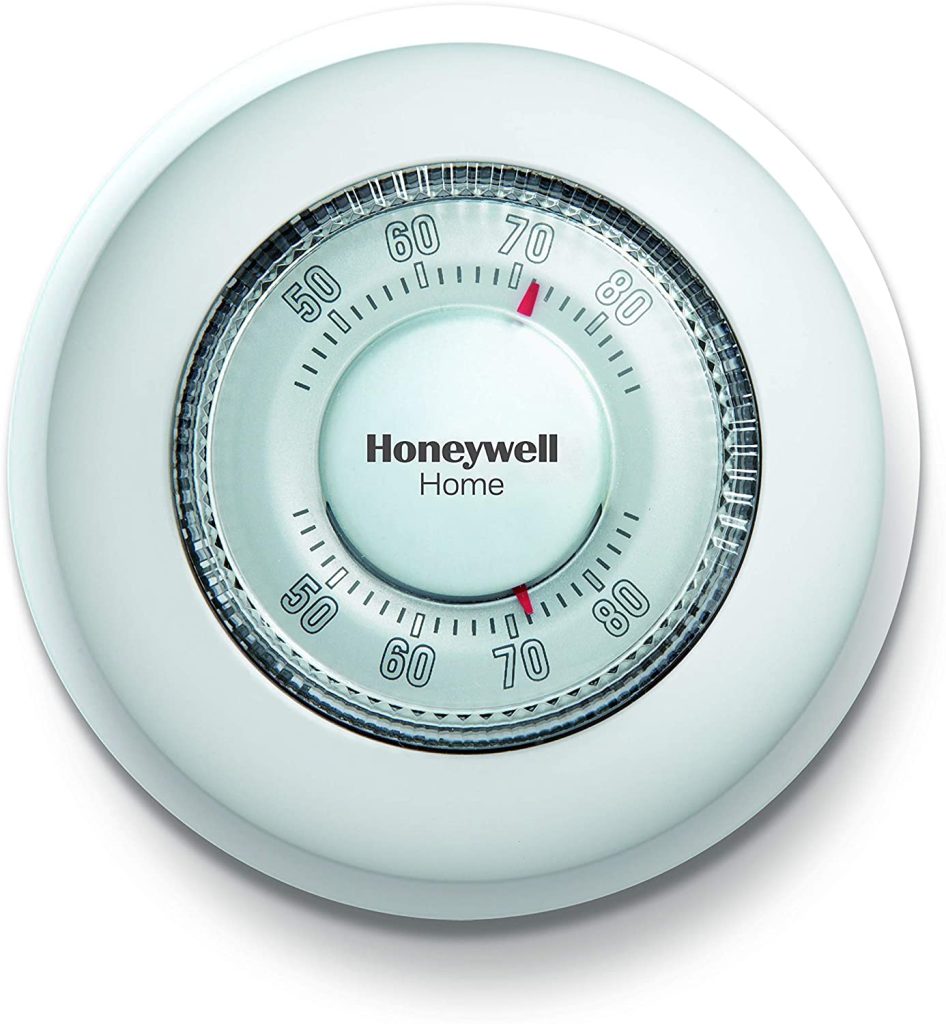
How To Install Honeywell Thermostat With Only 2 Wires
If you only have two wires, manual or battery-powered thermostats are your only options. The Honeywell T87 series is one of the best Honeywell two-wire thermostats available.
The Honeywell T87 is a classic circular thermostat that may be found in many old buildings, while some latest models include a lighted LED display instead of the traditional calibrated temperature meter.
Batteries are required for devices with an LED display but not for mechanical variants.
2-Wire Thermostats: What Are They Good For?
If there are just two wires protruding from the wall near the thermostat, it signifies the thermostat has just one feature: to turn on and off a single device.
It’s generally a furnace, but it might also be a space heater or an air conditioner. The two wires make a basic circuit that goes through the thermostat, which impacts the appliance as a dimmer switch.
The power stops flowing, and thus the device shuts off when the temperature sensor within the thermostat opens the switch. That is all there is to it. You won’t have to bother about compressors, reversing valves, or second-stage heating.
Identification of Conventional Thermostats
The connection terminals are located behind the backplate of a Honeywell thermostat, and the number of terminals varies depending on the model’s complexity.
However, regardless of whether there are two, five, or maybe more, they all have the same generic labeling. The R and W ports are the only ones you’ll ever see — and they’re the ones you require.
The hot wire from the 24-volt transformer that drives the gadget switch is designated by the letter R. The return wire to the transformer is labeled W, and it’s white.
The circuit will be basically complete, and the thermostat will be able to function properly after both of these cables are linked.
The two wires running out of your wall must be red and white. However, they may not be, but if they’re not, you’ll have to look at the appliance’s control center to figure out what’s what.
The terminals on the control center are the same as on the thermostat. Simply notice the colors of the wiring on the R and W connectors and link them to the thermostat’s R and W terminals.
Check the furnace wiring diagram to distinguish the terminals if you’re managing equipment without terminal labels.
Safety Factors to Remember
When working with 24-volt cables, you’re unlikely to receive a life-threatening shock, but it’s better to avoid getting any at all. Before installing the thermostat, switch off the breaker for the furnace or perhaps the air conditioner
The extra trim wire might damage other terminals while connecting wires to terminal screws. The thermostat will not operate if the wires meet and create a short circuit.
The wiring connections should be checked first if your heater or perhaps even the air conditioner runs constantly.
Installation of a Heating-Only Thermostat
Disconnect the Old Thermostat
Working carefully and paying attention to the wiring when disconnecting the old thermostat is essential. The wires are kept in place by the thermostat.
You may simply lose them down within the wall once you unplug them, and fishing them back out is not really enjoyable.
Instead, help ensure the wires are splayed out, so they don’t slide into the wall or tie them to the wall using duck tape once the old thermostat is replaced.
Switch off the thermostat’s power by sliding the power switch on the furnace disconnect or even by switching the breaker to the system’s circuit in your apartment’s main switchboard.
Remove the thermostat’s lid and then come to a halt. Two wires will now be connected to the thermostat. Take note of the letter that appears next to each wire termination.
Take a photo of this to use as a furnace wiring schematic if you run into problems afterward. If the wires seem to be the same color, use masking tape to identify them with the correct terminal letter.
Although many two-wire thermostats have changeable terminals, it’s important to keep a record of the wires and terminals in case they switch on the new thermostat.
There may well be extra wires wrapped up within the thermostat that is not being utilized; do the same for the fresh thermostat.
Remove the wires from the terminals by loosening the terminal screws. Next, disconnect all of the mounting nuts that hold the thermostat platform to the wall and take the previous thermostat away from the wall.
Examine the ends of the wires. Trim the ends if you notice any rust or other damage. After that, remove roughly 1/2 inch of insulation out of each wire.
Installing the New Thermostat
Typically thermostats feature a body and a base plate or mounting plate. Disconnect the replacement thermostat’s body out of its base plate using the operating manual.
Set the base plate against the wall and then use a level to ensure that it is exactly level. Also, be certain that it is facing the proper way up.
Trace the mounting screw holes with a pencil.
Drill holes again for new mounting screws. Install wall anchors using screws if there is no backing beneath the wall surface.
Thread the thermostat wiring through the hole(s) in the base plate and secure it to the wall using the provided screws. Verify that the base plate is level and adjust any required modifications.
Connect the New Thermostat to the Power Source
Plug each of the two wires to the proper terminal on the fresh thermostat base plate, according to the wiring of the previous thermostat.
If the terminals are replaceable, you can attach any wire to either terminal, but only one wire per terminal in either instance. To fasten the wire, tighten the terminal screws tightly.
Place the Thermostat Body in its place.
Although installing the thermostat body is a straightforward task, you should still follow the owner’s manual. Thermostat bodies are frequently constructed of plastic, and you don’t want to snap any important clips or holders.
Some could be fitted straight on, whilst others may require to be inserted at a slant and thereafter slipped into position. Next, follow the operating manual to set the thermostat’s anticipator.
- If the thermostat’s screen requires batteries, install them.
- Position the thermostat body correctly and secure it in place with a click.
- Reconnect the thermostat’s power supply.
- Check that the thermostat turns on and off the furnace as the temperature changes. If it runs, you may preset your thermostat, if you have one, or just set it to the temperature you choose.
Installing a Honeywell Thermostat Without a C Wire
Do Honeywell Thermostats Function Without An AC Wire?
Except for the Smart Round Thermostat, nearly all Honeywell Wi-Fi thermostats require a C wire (earlier called Lyric Round).
The term “C wire” refers to a common wire that links the Wi-Fi thermostat to the air conditioning systems to give the smart thermostat steady power.
If you don’t even have a C Wire and wish to install a Honeywell Thermostat, just install a C Wire Adapter. This is a quick, low-cost, and long-lasting solution. Simply put, using a C Wire adaptor, You will be able to solve your specific problem.
Honeywell Thermostat Voltage Requirement
Honeywell thermostats support both line voltage (240 or 120 volts) and low voltage (24 volts). The standard voltage for a centralized cooling and heating unit is 24 volts (24 VAC).
You must examine the voltage of the old thermostat placed in the system to determine whether you require low voltage or line voltage. For example, if it indicates 120 or 240 volts, your system will require a line voltage system rather than a low voltage system.
How to Install a Honeywell Thermostat Without a C Wire
To install a Honeywell Thermostat without a C wire, you would require to purchase a compatible plug-in transformer.
A transformer is ideal for smart thermostats since it was developed for all C wire purposes, has a standardized outlet, and a thirty-foot-long wire with a split assembly for ease of installation.
In addition, it meets the Honeywell voltage standards (24 volts) to power the smart thermostat properly.
The latest Honeywell Wi-Fi Thermostats come with a C-wire adaptor. The following procedures can be used to install these adapters.
Purchase a C-Wire Adapter
The best approach to connect the C-wire to the thermostat would be to use a C-wire adapter, including one provided by Ohmkat.
It features a function called One-Touch Power Test, which allows us to verify whether it is delivering power without using any extra instruments.
Furthermore, it is short-circuited, making it an extremely safe instrument. Even though it is externally wired and attached to your outlet, safety is essential.
Examine the Honeywell Thermostat Terminals
You can inspect the individual terminals after unscrewing the panel from your Honeywell thermostat. These may differ based on the thermostat, but the general arrangement is the same.
The major terminals with which we must be concerned are:
R terminal: This is the power terminal.
G terminal: This would be the fan control.
Y1 terminal: That’s the terminal that handles your cooling circuit.
W1 terminal: This would be the terminal that regulates your heating circuit.
The Rh terminal is only utilized to power the thermostat and therefore completes the circuit for the thermostat.
Connect the Honeywell Thermostat to the Required Devices
We can now begin putting in our Honeywell thermostat. To ensure your safety, switch off the electricity to your HVAC system before you begin any wiring.
Make a note of the wiring that is currently in place before you remove your previous thermostat. This is an important step because you must connect the identical wires to the appropriate terminals on the new Honeywell thermostat.
As a result, before removing your previous thermostat wiring, snap a photograph of it.
If you own a heating system, connect the matching wire to W1, which connects your furnace. Connect a wire to Y1 if your cooling system has one. Connect your fan to the G terminal if you have one.
Connect the Honeywell Thermostat to the Adapter.
As noted in the previous section, you must ensure that the connections are precisely the same as they were in the thermostat that you removed, with the exception of:
You must unplug the R cable that was previously connected. Then, connect one of the adapter’s wires to the R terminal instead.
You must connect the second wire from the adapter to the C terminal.
It makes no difference which of the two wires is connected to the R or C terminal. Ascertain that all wires are securely linked to their respective terminals.
It is preferable to avoid exposing the copper portion of the wire outside the termination. Only the insulation of all wires should be visible outside the termination.
Essentially, we’ve established a finished circuit in which electricity may flow from the R to the C wire and power the thermostat continuously. Consequently, instead of powering your HVAC system, the C wire is already running the thermostat.
Restart the Thermostat
After you’ve made all of the necessary connections, turn on the thermostat. Ensure that the electricity is still turned off until you have finished resetting the thermostat.
This is done to prevent short-circuiting and harm to the equipment.
All of the wiring done here is low voltage wire, so there is nothing to be concerned about. However, as a precaution, it is always best to turn off the power.
Then, when the top of the thermostat is securely reattached, you are ready to switch it on.
Turn On Your Thermostat
You may now put your Honeywell thermostat into a regular power socket and turn it on. If the thermostat begins to blink, it signals that all of the wirings have been completed correctly, and we are ready to begin setting it up.
All you require is a C wire adapter to rapidly and conveniently install your Honeywell thermostat. You may disguise the cables from your adaptor by running them through your wall.
If your walls or ceiling are halfway done, this will be easier. In any case, when you do this, be sure to verify your local regulations and ordinances to ensure no breaches are committed.
Certain systems will not turn on if the lid is not completely closed. As a result, be certain that the lid has completely sealed off the heating system.
Conclusion
It would be helpful if you noted that, unless otherwise specified, your Wi-Fi thermostat requires a C wire, as the C wire delivers a consistent supply of electricity to your HVAC system.
The Honeywell Thermostat, on the other hand, may be installed without a C wire. Therefore, it is not as difficult as it appears.
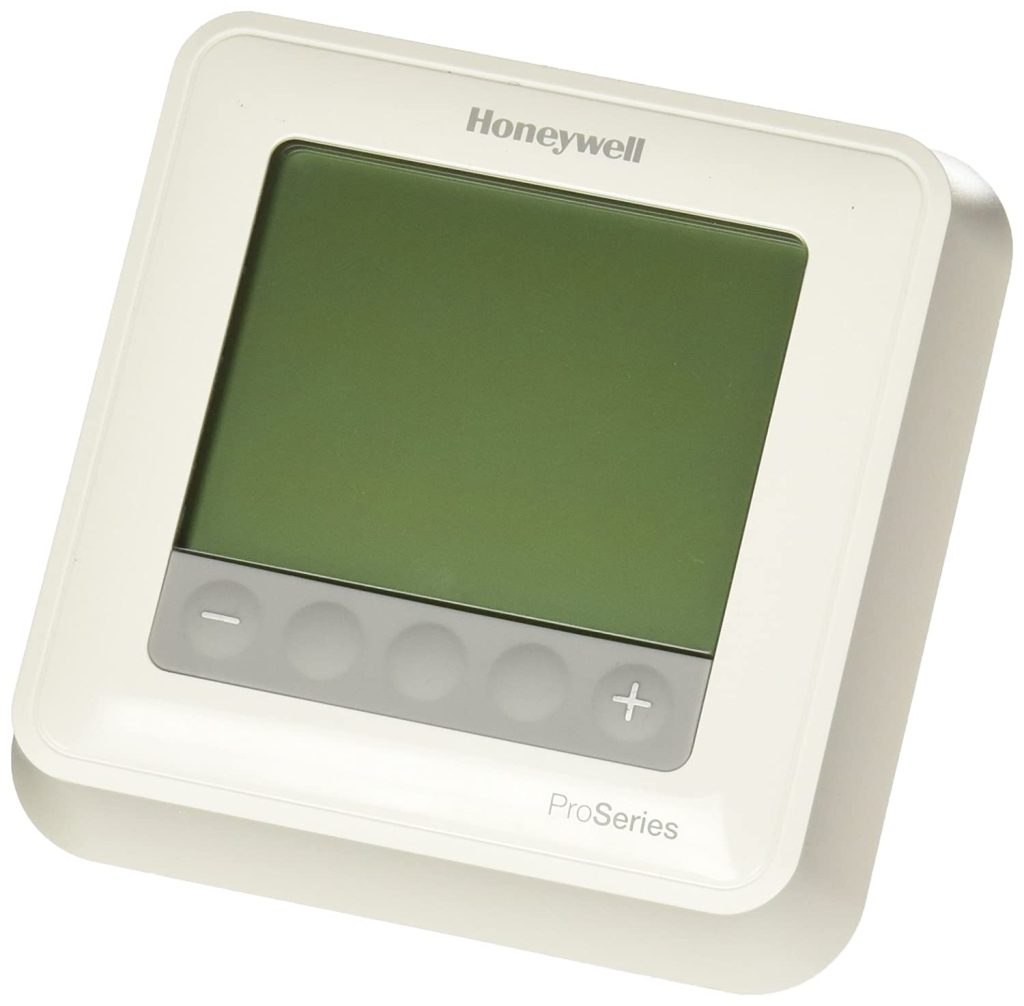
Thermostat Honeywell T6 Pro Installation
Installation Planning
- Identify the system type that is in use (i.e., heat pump, conventional electric, conventional gas, etc.).
- To guarantee appropriate performance, perform heat/cool tests on the current thermostat.
- Turn off the power and test the cables with a voltage meter to ensure that the electricity is turned off.
- To use as a reference, photograph the present wiring.
- Take out the old thermostat base.
Honeywell T6 Pro Installation
- Fix the junction box adapter to the wall. Using a pencil, align and mark the hole locations.
- Drill holes in the indicated locations and lightly tap the provided wall anchors into the wall.
- Wall-mount the junction box adapter.
- Hang the UWP from the junction box adapter’s top hook and snap the UWP’s bottom into position.
- According to the system requirements, attach wires to the appropriate terminals.
- Close the door by pushing up and clicking it into place when finished.
- Snap the secondary mounting plate onto the UWP.
- Replace the thermostat’s batteries.
- Fix the T6 Pro thermostat to the wall.
Setup
- Push the Start Setup button on the thermostat.
- Option 200 should be used to pick the system type, and option 205 should be used to select the powering method.
- Navigate to option 300 (auto changeover) and enable this setting.
- Continue through the menu options to Finish Setup and select Save Configuration.
- Continue to press Select until the date has been skipped.
- Choose whether or not the current location uses daylight savings time.
- Choose 12 hours as the time format.
- To skip the time settings, use the Select button.
Installation Guide for Honeywell RTH2300/RTH221
- The Honeywell RTH2300/RTH221 thermostat is incompatible with heat pumps that employ auxiliary heat or multi-stage systems.
- Switch the heating/cooling system off.
- Old Thermostat Must Be Removed
- Wire Detection: If any cables are not connected to the previous thermostat or are connected to a terminal designated C or C1, they will be disconnected from your new thermostat. Wrap electrical tape across the bare metal ends of each of these wires so they don’t contract and short out other wires.
- Install a New Wall Plate
- Undo the locking screw at the thermostat’s base. It is important to note that the screw is captive and cannot be withdrawn from the wallplate.
- Take the thermostat away from the wall plate.
- Place the wall plate against the wall and use a pencil to indicate the hole locations.
NOTE: Leveling is purely cosmetic and has no bearing on the thermostat’s function.
- Drill holes in the indicated locations and install the provided wall anchors.
- Pass the wires through the wide slot in the wallplate’s bottom center.
- Use the provided mounting screws to attach the wall plate to the wall.
- Assemble the wires and connect them to the terminals.
How to Install a Honeywell CT87K Thermostat
Change the breaker or replace the fuse that feeds electricity to the present thermostat. Remove the present thermostat; however, keep the wall plate with the cable attached in place.
Each wire should be labeled with the terminal to which it is attached to the wall plate. Unplug the cables from the wall plate with a screwdriver and detach the wall plate from the wall.
Slide the wires through the big slot in the bottom of the replacement thermostat and place it against the wall in the preferred mounting location.
With a pen, trace the location of the mounting holes. Disconnect the base off the wall and make a hole in the designated positions using a drill and an adequately sized drill bit.
Place the provided wall anchors in the drilled holes and softly pound them with the hammer till they are level with the wall. Put the wires through into the new thermostat’s big hole in the base and line up the mounting holes with the wall anchors.
Use a screwdriver to fasten the provided screws into the anchors.
Each wire should be inserted into the terminal on the new thermostat that matches the terminal on the previous thermostat. Using a screwdriver, securely tighten the terminal screws.
Push hard until the faceplate locks into place, aligning the tabs on the faceplate with the slots on the base.
Next, reconnect the CT87K thermostat to the power source and verify the system’s functionality. If the system doesn’t work, double-check all connections, fuses, and breakers.
Honeywell RTH230B Programmable Thermostat Installation
You can easily maintain a consistent temperature in your house with a programmable thermostat. Then you can save money on air conditioning systems expenditures since it can alter your home’s temperature even while you are not there or asleep.

One type to consider replacing your thermostat with is the Honeywell RTH230B programmable thermostat.
However, take into account that if your old thermostat were plugged directly into an electrical panel, you wouldn’t be able to use this model. So instead, this is how you connect it to your existing heating and cooling system.
To avoid electric shock, switch off the electricity to the house. To illuminate your work area, use a flashlight or a lantern.
The old thermostat should be taken down from the wall. In most situations, this entails unscrewing the base from the wall and removing the cover off to reveal the screwed-on base.
This will reveal the circuitry hidden beneath the old model. Leave the cables connected to the old thermostat for now.
Each wire connecting to the previous thermostat should be labeled with the letter of the terminal into which it was screwed.
Unscrew the indicated wires from the terminals and remove the ends of the wires to reveal one-quarter inch of wire. To keep these wires from getting lost within the wall, roll them around a pen.
Remove the Honeywell thermostat’s lid. Loosen the screw at the bottom that secures the thermostat unit to its base, then pull the thermostat unit up to get access to the base behind it.
Insert the plastic anchors that come with the Honeywell thermostat into the previous unit’s holes.
Unwrap the wires from the pencil and feed them through the big square hole in the unit’s baseboard. This will enable you to connect to the new thermostat. Insert the screws into the base and press it against the wall. Fasten them into the wall anchors.
Connect the wires to your new thermostat’s terminals in the same manner that they were connected to the previous device. Refer to the handbook in the resource link section for diagrams to wire various conceivable setups.
Rh represents the heating power supply, Rc represents the cooling power supply, W represents the heating signal, Y represents the cooling signal, and G represents the fan.
The thermostat should be located on the rear of the electronic device. Locate the J2 jumper switch and set it to HE for an electric furnace or HG for a gas furnace. This will change the fan settings for the way your house is heated.
Remove the battery cover from the electronic base’s front. It’ll be just above the monitor screen. Next, replace the lid and the 2 AA batteries. Next, a series of tests should begin to run on the display. When those are completed, the current temperature will be shown.
Secure the top two corners of the electronic thermostat to the base first, then tilt the device down. To keep the electrical base from shifting, reinstall the locking screw.
Replace the faceplate over the electronic device and re-energize the home.
For programming instructions for the Honeywell RTH230B programmable thermostat, go to the user manual in the link section.
FAQ’s
What is the Honeywell Thermostat K terminal?
The K terminal, which is part of the Wire Saver module on Honeywell Thermostats, is a proprietary terminal.
It functions as a splitter, allowing the G and Y1 wires to be attached to it to link systems that do not have a C-wire. It is, nevertheless, incompatible with a number of systems.
R and Rh, are they the same thing?
R is where a cable from a single main power supply would be connected, whereas wires from the heating systems parts would be connected to Rh and Rc, respectively, in units with two different sources of power.
However, most new smart thermostats have Rc and Rh jumpered so that a single R wire may be connected to either the Rc or Rh terminal.